Thursday, November 11, 2010

daddy long legs...legs?

second project: project of choice

I am making an ear piece/ face piece. It is to resemble daddy long legs' legs. I still don't know if I will include some sort of body to the legs. I do like how the legs look alone thought for now. The legs are constructed out of copper wire and tubing. They look almost mechanical. The piece will end up being an earring, however I am not at that stage yet.

Wednesday, October 27, 2010

stone setting

I knew in order to stay on track I need to start research ASAP. Studio just ended so I hit the lab. I came across a website. It has a list of artists to the right. A lot of the pieces made are for production.


http://worldartisangems.com/

Theresa Burger is one of the names shown as you scroll down. That is who mainly caught my eye.


Monday, October 18, 2010

decisions decisions

PROJECT OF CHOICE!

that is my final answer.

expect real insects....dead ones of course. I guess it will be a display of them.


Friday, October 15, 2010

Transformation Brooches Project

I finished my pieces for Jewelry. They still ned some touching up, however they are finished for the most part. The photo quality isnt great but here they are!


Saturday, October 2, 2010

Casting...

So after spending numerous hours carving, rolling and cleaning up wax, I finally completed two major parts of my brooches. I made one brooch entirely of spruing wax. This brooch is to represent larvae. It took on an organic shape of its own as I made it. The other brooch is just of the major make up of an ant. The legs of the ant will be fabricated along with the antenna and mandibles. The thorax portion of the ant did not cast. Not a big deal. I may try to construct something out of plastic for it. Plexiglass is also being used in my pieces so that could possibly help to tie it all together. I still have to remove the sprues and clean up. Nevertheless, a good portion of work is done.

Tuesday, September 21, 2010

research on ant farm

So instead of the original sandy dirty ant farms, there are new ant farms. They use blue gel instead. It looks unreal and creepy.....the ants are just floating in these little tubes, so weird. Anyways, I am going to model one of my brooches after ant farms. We will see how that works with plexiglass, silver, and possible some sand or dirt!


ants cont.

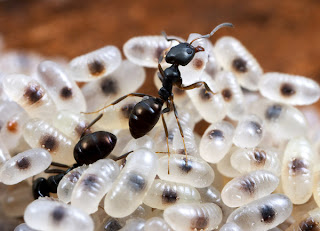
here are some yummy ant images!


Monday, September 13, 2010

new theme: insects

I have finalized a theme for this semester. I am working strictly with insects. The first project is a series of three brooches that show transformation. I have decided to work with a view from nature to examination(scientific). The insect I have chosen is the ant. As small and as insignificant as it may seem, the ant is important to us as humans. it is also tougher than we imagine. The Maricopa Ant is the deadliest insect in the world. With just four stings, it can kill a lab rat. Not only is this ant deadly, but its body is made up of amazing shapes. One brooch is going to show the nature of the ant, where the ant lives. The next brooch will be a detailed ant. This way we can see the make up of the ant. The final brooch will be a play off of an ant farm. That is where the scientific examination comes into play. Also, these brooches can all be playful. I like pieces that the wearer or the viewer can interact with. I hope to make the ant farm most playful. Once the sketches are finalized, I will post images along with sample pin backs.

Wednesday, August 4, 2010

Collecting..

I have been collecting different artists websites off of lostateminor.com

I LOVE THAT SITE!!!

This is what I came across the other day. It relates to my insect craze!
http://www.lostateminor.com/2010/08/02/flylashes-dead-fly-feet-eyelashes/

the summer of slacking

This summer, I took a rubber mold making class. It was for the month of June. I finished all three required molds and had multiple wax injections of each. Needless to say, that is all the art I have done all summer long. It has bothered me, I will admit that. However, that was not enough to encourage me and inspire me to do more. I guess I have been in a funk.

This past weekend, I ventured to NYC and Philly. I have been to NYC numerous times. As usual, we stayed in the New York Loft Hostel in Brooklyn. I find Brooklyn inspirational. I love the decay of the buildings. I love the spray painted walls. I love the wheat paste murals falling off buildings. I love the fire escapes. I love the dumpsters. I love how everything has layers.

Anyways, while in the city, my friend wanted to do some shopping in SoHo. Since I am broke and forever will be, I had no real interest in shopping. So all weekend, I took photos, over 300, however it still does not seem to be enough. In SoHo, we had passed this shop called The Evolution Store. I looked through the window as we passed by. Her brother had bought gifts from this store before. I saw bones and skulls and needed to go inside. Inside this store were bones, bugs, eyes, wings, creatures in weird bottles filled with blue liquids. I was in awe. I studied everything. I touched as much as i could. They had beetle wings, raccoon penis bones(weird, I know), alligator heads, sharks, etc. IT WAS AMAZING. After seeing all of these weird parts of creatures I felt so happy. I guess I liked the way they broke down the insects mostly. I wanted to see more! Then, I started thinking. The cranks started turning. This could be my theme for the fall semester. Since then, I have been picking at my brain for ideas. I have done some sketches and some research. Hopefully, I can actually use this as my theme. It is the first idea I have thought of and been excited about.

theevolutionstore.com

Sunday, May 9, 2010

final piece, first junior studio

Last night, I worked in the studio until about midnight on my final piece. I made the switchblade. The original design was what IS tuck with, however it seemed too bulky. I just did not like the way it looked. I decided I would cut and piece into the copper. It has edges that represent graffiti inspired lines. I then just pierced some circles into the metal. This goes along with the rivets and previous graffiti etches I did earlier in the semester. The knuckles are made out of pine, so I am actually painting them. So far, I had used a black spray paint to cover most of it. I left some wood visible. I have not decided if I will eventually cover i all up or what. I will post a photo when it is complete! Crit is tomorrow at 7:40 am! I've got to print out my papers and finish painting.

Thursday, May 6, 2010

other knuckles


flatware

For my final project, I have decided to make a set of wooden knuckles, like brass knuckles. From the knuckles, a switchblade will flip out! I am pretty excited for this. I feel like I chose easy shapes to work with. I only need a few rivets and minimal soldering. So far, I have all of my pieces cut out. The rest is the construction. Once I am completely finished putting the pieces together, I will then paint the knuckles. I am not certain as to what type of design I will paint of them, but it will be urban inspired.


http://12oz.com/

this website has multiple graffiti pages. These artists are from all over.

I really like this color scheme here. The style is nice as well.
http://s567.photobucket.com/albums/ss120/TUFFCITYSTYLES/?action=view¤t=29110_1366646420205_1653013203_9080.jpg

Hopefully, I will come up with a solid graffiti scene for the wooden knuckles!

Sunday, May 2, 2010

researchhh

I woke up with an awful cold, so I have been running through websites finding some amazing work. Since my topic is urban culture, I have found a lot of urban artists. Most of them started off practicing typical street graffiti...the illegal kind. Now, they are all commissioned to do work in public spaces.

Here is a video featuring Alex Pardee and David Choe. I came across Pardee a few years ago. Choe I just stumbled upon on Tuesday. Thus far, he has inspired me the most.

http://www.youtube.com/watch?v=yDFQg0wPuLk&feature=player_embedded

David Choe: BRILLIANT! His work is beautiful. I love it. I believe last week was the opening of his latest show in L.A. He uses a lot of portraits in his work, however he adds a lot of graffiti inspired lines and images as well.

http://davechoe.blogspot.com/

Here are some of his works. I cannot stop looking at his blog!


Judith Supine is another street artist I found. I've seen his work before, but I never placed a name with it. He does ridiculous collages! Weird green people with multiple heads and other body parts. It makes me laugh. It is all just so bizarre.
http://www.flickr.com/photos/judithsupine/


C215 is another street artist. He has done some commissioned work. He creates these images using stencils and paints. He does all of this on paste paper, then he places the paper on the streets....up on walls, trains, phone booths, etc. http://www.flickr.com/photos/c215?PHPSESSID=4f20ff11d1fa18cf1fac6e8e000818aa

I honestly keep looking at their work. The colors are the best part. For my final piece, I'm making wooden knuckles and attaching a switchblade to them. It is a flatware based project. I wanted to make a spoon, but in the end it really does not portray urban culture at all. Tara suggested I work with the switchblade because it is flatware and it does give off the urban context. So my idea is to add color to the wooden knuckles. I was inspired by the rusty, graffiti doors


Tomorrow I am headed to the metal market, so I hope my knife will be cut and filed by tomorrow. Then, I would like to manipulate the stainless steel for the sides of the knuckles. We had discussed corrugating them..which could be very interesting! I just cannot wait to add some color!

Wednesday, April 21, 2010

my first ingot!

My ingot pour was awful to say the least. My fine silver melted just fine. The pouring part is what got me. I did not have a good flow going I guess. The bottom half of the ingot turned out pretty solid, however the top basically turned into a wire and then it overflowed out the top of the mold. It was a good learning experience though. I know I can melt it all down again, so I'm not too concerned. We took some photos of my ingot experience. Here they are.


Sunday, April 11, 2010

SOUND PROJECT


These are images from my Sound Project. I am creating a mouth piece, so I used Jett Basic to mold my teeth. It was a really great material to work with. It consists of these little granules that you melt down in hot water. Then you remove them from the water. At this point, they are in gel form. Then you mold the gel and work the gel, quench it in cold water, and then you have your impression.

It gave me the impression of my teeth fast, which is what i needed. Thank you to Amanda for letting me use it!! So from there, I made three impressions with the Jett Basic. I picked the impression i liked best and then proceeded to pour melted wax into it. From there, I cleaned up the wax model of my teeth. Today, I invested the teeth. Tonight, they're being burnt out, so hopefully tomorrow I can cast them!

Today, I also etched into my silver backing piece. It was just another attempt at graffiti symbols and such. I'm not too thrilled with the way it worked out, however I feel like I can make it work somehow.

Sunday, March 21, 2010

Pin Swap


So, for my first pin swap at SNAG, I took Scrabble letters and gave them pinbacks. I sued Expoxy, but I did not mix it right and the backs fell off! oops! On top of the letters, I took paper from an old book. It was a color book written in Italian. I ripped out some pages, rolled them in gel medium to make them stiff. Then, I sprayed them with some spray paint to give them contrast. I did not love them, but I did not hate them. I did trade for a lot of beautiful pins! At first, I was intimidated and nervous to go up to others and ask to trade pins. After a while, it did not seem like a big deal. A few of the girls I spoke to said it was their first time at SNAG as well. I felt silly though because I did not have cards to go with my pins. I made a mental note about that so I have them for next year. Overall, it was a fun experience. People used all sorts of materials. Some used metal, others sewed theirs, used plastic, crayons, toilet paper.....there were a lot of recycled materials used. They all turned out very nice, and I am happy that i participated in the pin swap.